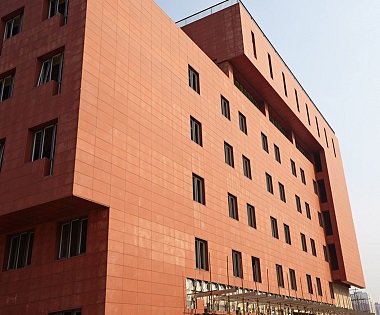
Terracotta Facade Corners: Types, Setting Out and Inspection
Compare terracotta facade corner types and coordinate geometry, joints, flashings, support, setting out, tolerances, mock-ups and site inspection.
Historical archive: product availability, standards and event information may have changed. Contact LOPO for current specifications.Terracotta facade corner details must coordinate appearance, support, movement, drainage, fabrication and installation tolerance. A corner is not simply two panels meeting at an assumed angle. It is a transition between facade planes, and it often concentrates survey deviations, cut edges, brackets, flashings and visual alignment.
This guide compares corner concept types and establishes a set-out and inspection workflow. The architect, facade engineer, contractor, supplier and relevant authorities must approve the project detail. Typical photographs and sketches are design references, not universal construction instructions.
Define the Corner Condition First
Identify whether the condition is an external corner, internal return, reveal, column enclosure, curved transition, parapet return or junction with another material. Record the actual angle, panel orientation, module, joint intent, cavity, barriers, structure, access and adjacent interfaces.
Select the exact product family from the LOPO terracotta panel overview before detailing. Hollow panels, solid units, baguettes and special-shaped pieces have different edges and fixing interfaces.
| Corner concept | Design opportunity | Items requiring project review |
|---|---|---|
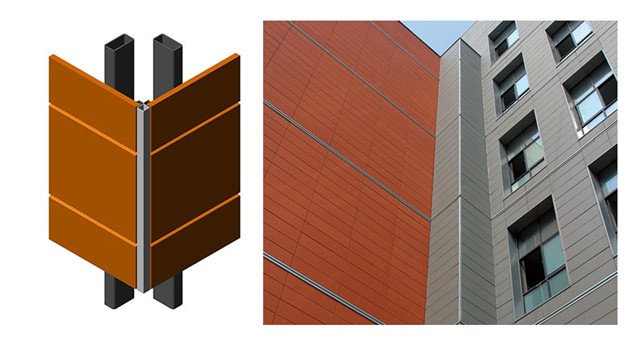
| Open or expressed joint between separate units | Makes the junction legible and can tolerate a deliberate shadow line | Cut edges, joint width, backing, drainage, sightlines and support positions |
| Cut or mitered panel junction | Creates a visually continuous ceramic corner | Actual angle, remaining edge strength, cut quality, protection, joint and fixing clearance |
| Metal trim or flashing | Can form a deliberate line and coordinate weathering | Profile, coating, drainage, movement, corrosion interfaces, attachment and replacement |
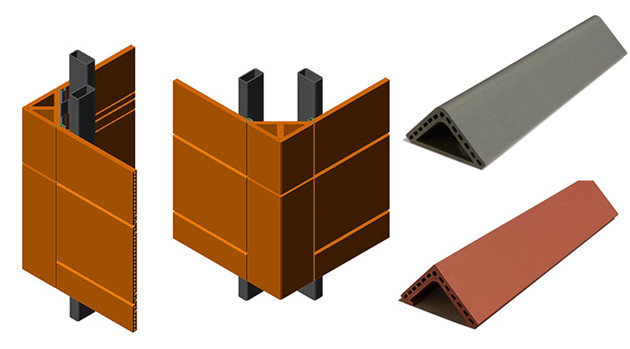
| Special-shaped terracotta piece | Can continue clay material around a return or create a distinctive profile | Manufacturing feasibility, tolerances, tooling, samples, supports and replacement stock |
| Baguette or secondary clay element | Can screen the junction or create depth around a corner | Independent supports, loads, orientation, clearance and access |
Select the Concept from Project Priorities
Decide which priorities govern: a monolithic appearance, a visible shadow joint, a contrasting line, minimum site cutting, tolerance absorption, simple replacement or a custom clay expression. Do not rank one method as cheapest or best without project-specific quotations, fabrication review and installation planning.
Early coordination should include proposed unit widths on both elevations. A corner that leaves a narrow cut piece or disrupts the facade rhythm may need the grid to shift. Check window reveals, columns and control joints together rather than solving the corner after panel schedules are fixed.
Set Out from Surveyed Geometry
- Establish project datums. Use approved control lines tied to the building survey and facade grid.
- Survey the support. Record the constructed angle, slab edges, embeds, openings and out-of-tolerance conditions.
- Resolve the visible apex. Define where the finished corner line sits relative to structure and adjacent materials.
- Work back to the panel grid. Coordinate unit widths, joint centers, cut edges and support locations on both planes.
- Check build-up depth. Include brackets, rails, cavity, insulation, barriers, flashings and adjustment.
- Issue enlarged details. Show plans, sections, elevations and an installation sequence for every distinct corner type.
The terracotta panel installation checklist explains how survey, first-work approval and concealed-work inspections should be recorded on site.
Coordinate Support, Movement and Weathering
Each panel or special piece needs an engineered support and restraint path. Brackets and rails should not collide at the corner or force one facade plane out of alignment. Check access for fasteners and for later replacement. The back fixing component overview illustrates typical families, but the project engineer must approve the actual arrangement.
Define movement across the junction. A rigidly locked corner can attract unintended stress, while excessive freedom can change joint alignment or engagement. Coordinate building movements, panel and frame movements, tolerances and the function of every fixed or sliding connection.
Weather management must be traced behind the visible corner. Show barriers, laps, flashings, cavity continuity, drainage outlets and transitions to windows, roofs or other cladding. A trim or joint insert should not be assumed to form the primary weather line unless the approved system design says so.
Review Fabrication Before Release
For cut pieces, confirm cutting location, edge condition, minimum usable geometry, handling and inspection criteria with the supplier and engineer. Do not cut through fixing zones or reduce support engagement without approval. Protect finished edges during packing and installation.
For special-shaped clay units, provide a controlled profile drawing or model, orientation, finish, quantity and fixing interface. Review feasibility, tooling, samples, color range and production tolerances before the facade module is frozen. The terracotta baguette range may offer options for screened or articulated corners, subject to separate engineering.
Use a Corner Mock-Up
A representative mock-up should include both facade planes, the proposed joint or trim, support access, barriers and adjacent materials. Review the corner from relevant distances and lighting conditions. Check line, panel widths, color distribution, cut edges, joint depth, flashing visibility and the ability to remove a unit.
The original archive images are retained below because they illustrate two visual directions. They do not show complete concealed details.
Inspect Corners During Installation
- Verify the surveyed datum, finished corner line and module on both elevations.
- Check component identities, brackets, rails, anchors and concealed barriers before closure.
- Inspect cut edges, chips, cracks, fixing engagement and clearances.
- Confirm trim alignment, coatings, isolation, laps and drainage provisions.
- Compare joints, plane, color range and special-piece orientation with the approved mock-up.
- Record deviations and obtain an approved disposition instead of hiding them behind trim.
- Confirm safe access and the documented method for future replacement.
Frequently Asked Questions
Must every external corner use mitered terracotta panels?
No. Separate panels, expressed joints, trims, shaped clay units or other project-designed solutions may be appropriate. Selection depends on geometry, support, weathering and visual intent.
Is a standard corner angle suitable for all buildings?
No. Detail the surveyed and designed condition. The apparent facade angle, panel cuts and concealed support geometry must be coordinated for the project.
Can a metal trim correct an out-of-tolerance substrate?
Do not assume so. Survey the deviation and obtain an approved response. A trim has defined geometry, attachments, movement and weathering functions; it should not conceal unresolved support problems.
When should a special-shaped corner piece be approved?
Before production release. Approve its profile, finish, tolerances, fixing interface, sample or mock-up, quantity and replacement strategy with the supplier and project team.
Coordinate the Corner Before Fabrication
Send corner plans, sections, elevations, panel schedules, finish intent and fixing concept through the LOPO project enquiry page. LOPO can review product feasibility; final design, engineering, installation and compliance remain project responsibilities.